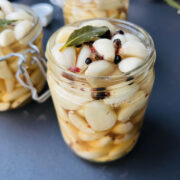
Pickled Garlic
This is how to make pickled garlic at home, either plain or spicy pickled garlic – with a quick and simple process!
Servings 30 servings
Calories 36kcal
Cost £7
Equipment
- 3 jars
- 1 pan
- 1 knife
Ingredients
- 500 grams garlic cloves peeled
- 350 ml cider vinegar
- 50 grams cane sugar optional
- ½ teaspoon celtic salt
- 1 tablespoon mustard seeds
- 1 tablespoon black peppercorn
- 6 small bay leaves
- 1 pinch red chili flakes dried
Instructions
- Sterilise 3 x 225g ( 8 oz) jars or 1 x 720g (24 oz) jar (see notes for more details on how to correctly sterilise jars).
- Peel the garlic cloves and add them to the sterilized jars. Sprinkle a pinch of dried chili into the jars. Set aside.
- Pour the vinegar into a pan and add the sugar, peppercorns, and mustard seeds, and bay leaves. Stir well, then set the pan on high heat and bring to a boil. Once it's boiling, turn the heat down a little and boil for 2 minutes. This will be your pickling liquid.
- Gently and carefully, pour the pickling liquid over the garlic, submerging the garlic cloves completely.
- Seal the jars with vinegar-proof lids and store them somewhere dry and dark for at least 2 weeks. I put them in the cellar. Just check to make sure the garlic stays covered by the brine. It shoould be ready to serve after two weeks or so.
Notes
How to correctly sterilize jars
- The oven method.
- Firstly, wash them in hot soapy water, rinse them well, and then dry them in the oven at 110°C/Fan 90°C/ 230°F/Fan 195°F.
- The dishwasher method
- Simply put through a short dishwasher cycle to sterilize the jars.
Nutrition
Calories: 36kcal | Carbohydrates: 8g | Protein: 1g | Fat: 0.2g | Saturated Fat: 0.03g | Polyunsaturated Fat: 0.1g | Monounsaturated Fat: 0.1g | Sodium: 42mg | Potassium: 83mg | Fiber: 0.5g | Sugar: 2g | Vitamin A: 6IU | Vitamin C: 5mg | Calcium: 34mg | Iron: 0.4mg