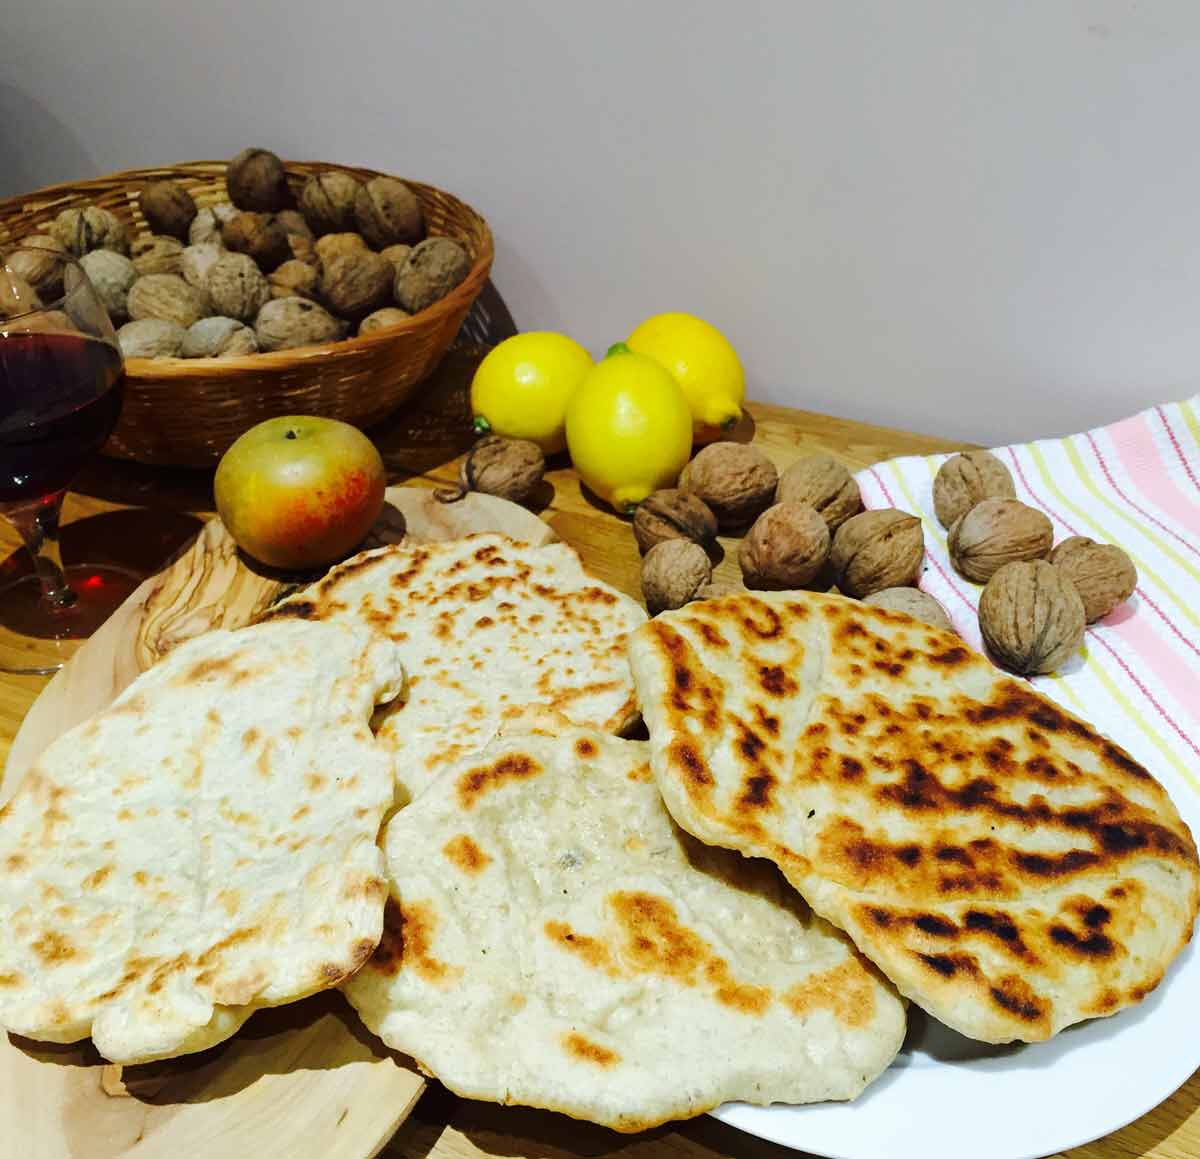
I need to mention my beloved grandma again, because this homemade flatbread recipe of hers definitely sends me back in time, back into my lovely childhood times.
When she was telling us she was going to make those 'turte' as we call them we were over the moon, jumping up and down with joy.
Unlike nowadays, then, it didn't take a lot to make children happy, right?
This flatbread is easy to prepare, there is a little waiting/passive time, however, this is not necessary if you don't have that time in hand. If you do, leave it for few hours, place it somewhere warm or, in a sunny day, just place it where the sun might reach to give it a nice cuddle and just cover with a towel.
This will speed up a little the fermentation time. So I would say 45' in a warm/sunny area will be equivalent to 1.5 h in a cooler place. Just do your best and do not worry even if that 45' won't be there. They will still be delicious and worth a try. The taste is purely unique.
Do I need to knead my flatbread?
I have to say that kneading and bread-making is one of my favourite areas. I love doing it. Stay put as I am beginning my bread making posts and recipes. I have not had the time to put any of my bread recipes in yet, this being the first one but, the time has come for this so, stay tuned as there is plenty more to come.
I find kneading and bread-making in general really rewarding as the results are always great!
I have to say I have ditched the habit of buying bread for a while now as I can make pretty much any type of bread but I have resumed my efforts to the healthier options and lately, the spelt flour, is my absolute favourite. The sweetness and the nuttiness of the spelt flour is just so unique and to die for. LOVE it!
I am pretty sure I will convert you now into making your own bread and never have to buy one any longer but only on really lazy times.
I'm not sure of the amount of bread you are having a day or per week but you can adjust this and make the right amount for a whole week or even two weeks and eat daily and feel like you've just made it. I will tell you how.
This is how to best store your homemade flatbread!
I make my bread, let it cool for a few hours, slice it and freeze it. Yes! Freeze it!
I know you might be rubbing your eyes but don't!; you are reading the right thing ?.
By freezing the bread I assure you that it remains as fresh as this was when it went into the freezer. Just freeze it, slice it and toast it whenever needed. It's really the best.
Here are some more recipes you may enjoy!
- Healthy Lentil Bread (Flourless)
- red split lentil
- vegetarian halloumi burger on flatbread
- salmon pate
- kidney and pinto bean hummus
- homemade delicious hummus
Can I use this flatbread recipe for a pizza base?
Yes, absolutely. This will work perfectly for a pizza base. I use it all the time.
Let's get kneading, shall we?
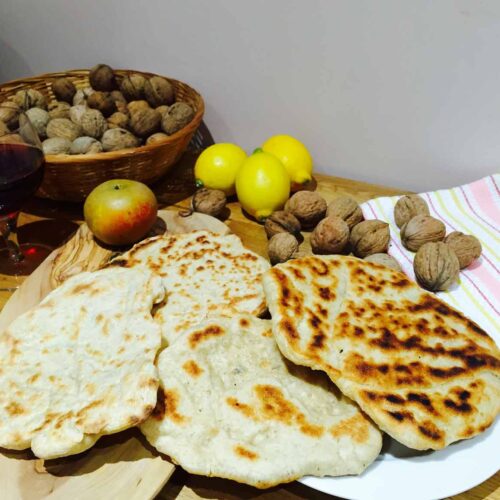
Homemade flatbread
Equipment
- skillet or any cast-iron dish
- glass bowl (large)
- mug
- Rolling Pin
Ingredients
- 500 g white flour (organic)
- 200 ml water (lukewarm) a little more if necessary
- 1 teaspoon sugar
- 15 g dry yeast or 1 oz fresh yeast
- 1 teaspoon salt
- olive oil (to cook)
Instructions
- In a mug or a small bowl put the yeast and the sugar topped by 50 ml of lukewarm water. Mix well and place aside for a few minutes.
- Meanwhile, add the flour in a larger bowl together with the salt. Make a well and pour in the yeast mixture. Allow to rest for 20-30 min.
- Mix all and keep on pouring the warm water gradually. Knead the dough for about 10 minutes until the dough no longer sticks to your hand and becomes really elastic and smooth.
- Sprinkle some flour or drizzle some olive oil and shape the dough. Cover with a kitchen towel and place in that warm or sunny side of your kitchen. Allow this to rise till it gets about double in size. I would say 45' in a nice and warm place or 60-90' if cool.
- When you are happy with the rising of the dough, prepare the working surface by dusting it with some flour.
- Pick up a small amount of dough (the size of a clementine) and on the floured surface reshape the dough by flattening to a desired thickness (I suggest no thicker than ½ cm). You may flatten them by hand or using a rolling pin. Allow them to rise for 5-10 min if you can and have enough space. They will be puffier.
- Place a pan on fire (ideally a cast-iron one) with a few drops of oil or even without. Cook on a low-medium fire till cooked on both sides. I will probably take 3-4 min on each side depending on how thick they are. Continue with cooking all until the very last.

Edwin Ortiz says
Please. Can I get this recipe in US measurements?
Ramona says
Sure, you now have the option to switch between metric or US imperial.