Do you ever have enough of homemade bread, what about some spelt flour buns? I never!!!
But seriously now, what could be compared with a nice healthy hand-kneaded loaf of bread or buns which I seem to be pretty obsessed with at the moment with baking?
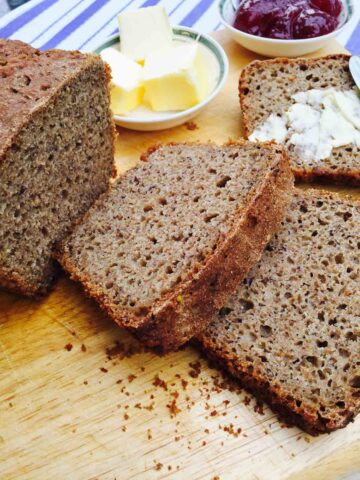
I love and truly enjoy making bread. It is, in fact, my top preference for any baking and I feel it's the most rewarding work in the kitchen. There's also the healthy element to consider: homemade bread is way healthier than most bread out there in supermarkets. It contains only what you know very well you have put in and no nasty coloring to pretend it's a healthy wholemeal bread, no nasty additives to make it long-life. Just simple and pure bread, the real stuff! And, it tastes so good!
Jump to:
What Is Spelt Flour?
Spelt is an ancient form of wheat that was considered a peasant staple from the Bronze Age to Medieval times. It was particularly popular in central Europe before it went out of fashion in the 19th century but is gaining more and more popularity lately.
Spelt flour comes in a more or less processed form, it comes as white and wholegrain.
Ingredients you will need
- spelt flour
- white flour
- water (lukewarm)
- yeast dry or fresh
- cane sugar (unrefined)
- salt - use a good salt like Celtic or a good Himalayan pink
- black pepper (freshly ground)
- buttermilk optional
- olive oil
Substitutions and Variations
- Flour Alternatives: you can certainly use whole wheat flour, gluten-free, oat flour, or a mix of almond and coconut flour for gluten sensitivity.
- Flavor Enhancements: you can add spices like cinnamon for a sweet version or herbs like rosemary and thyme for savory buns.
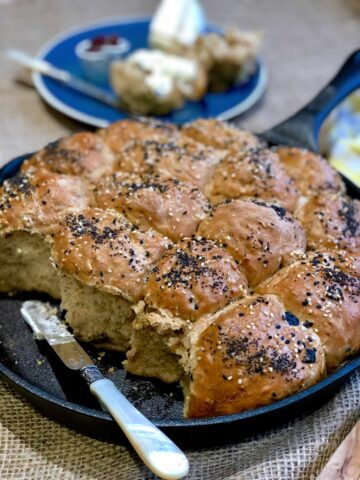
- Texture Additions: You can add mix seeds (sunflower, sesame, flax), dried fruit ( cranberries, sultanas, raisins, chopped apricot), or nuts (chopped walnuts, almonds) into the dough for added crunch.
- Vegan Option: use almond or oat milk, coconut oil, or vegan butter.
Serving Suggestions
- Breakfast: Serve the buns with butter, honey, or jams like Cranberry Jam, Rhubarb Jam, Simple Elderberry Jam, or this Perfect quince jam for a hearty morning meal.
- Lunch/Dinner: Pair these homemade spelt buns with soups like Cherry Tomato Soup, Luscious Wild Garlic and Nettle Soup, Oxtail And Lamb Soup, or a hearty stew like this amazing Beef Casserole, just imagine dunking these buns into that.
- Snack: Use those buns as a base for mini sandwiches with fresh veggies, hummus, or cheese spreads.
- Party Option: Serving them alongside dips such as Creamy Eggplant Dip, Creamy Cucumber, Fennel & Yogurt Dip, this Kidney And Pinto Bean Hummus.
Recipe FAQs
It contains gluten, but a bit less than the standard wheat, and wholegrain spelt flour is pretty similar- nutritional value-wise to wholewheat flour, except that it contains more minerals and it is easier to digest than wheat flour.
The bread made with spelt flour tastes sweeter and a bit nuttier and not so dry as wholewheat bread, overall making it a much better choice.
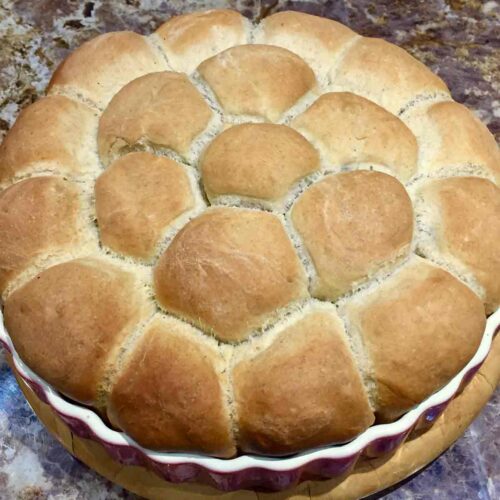
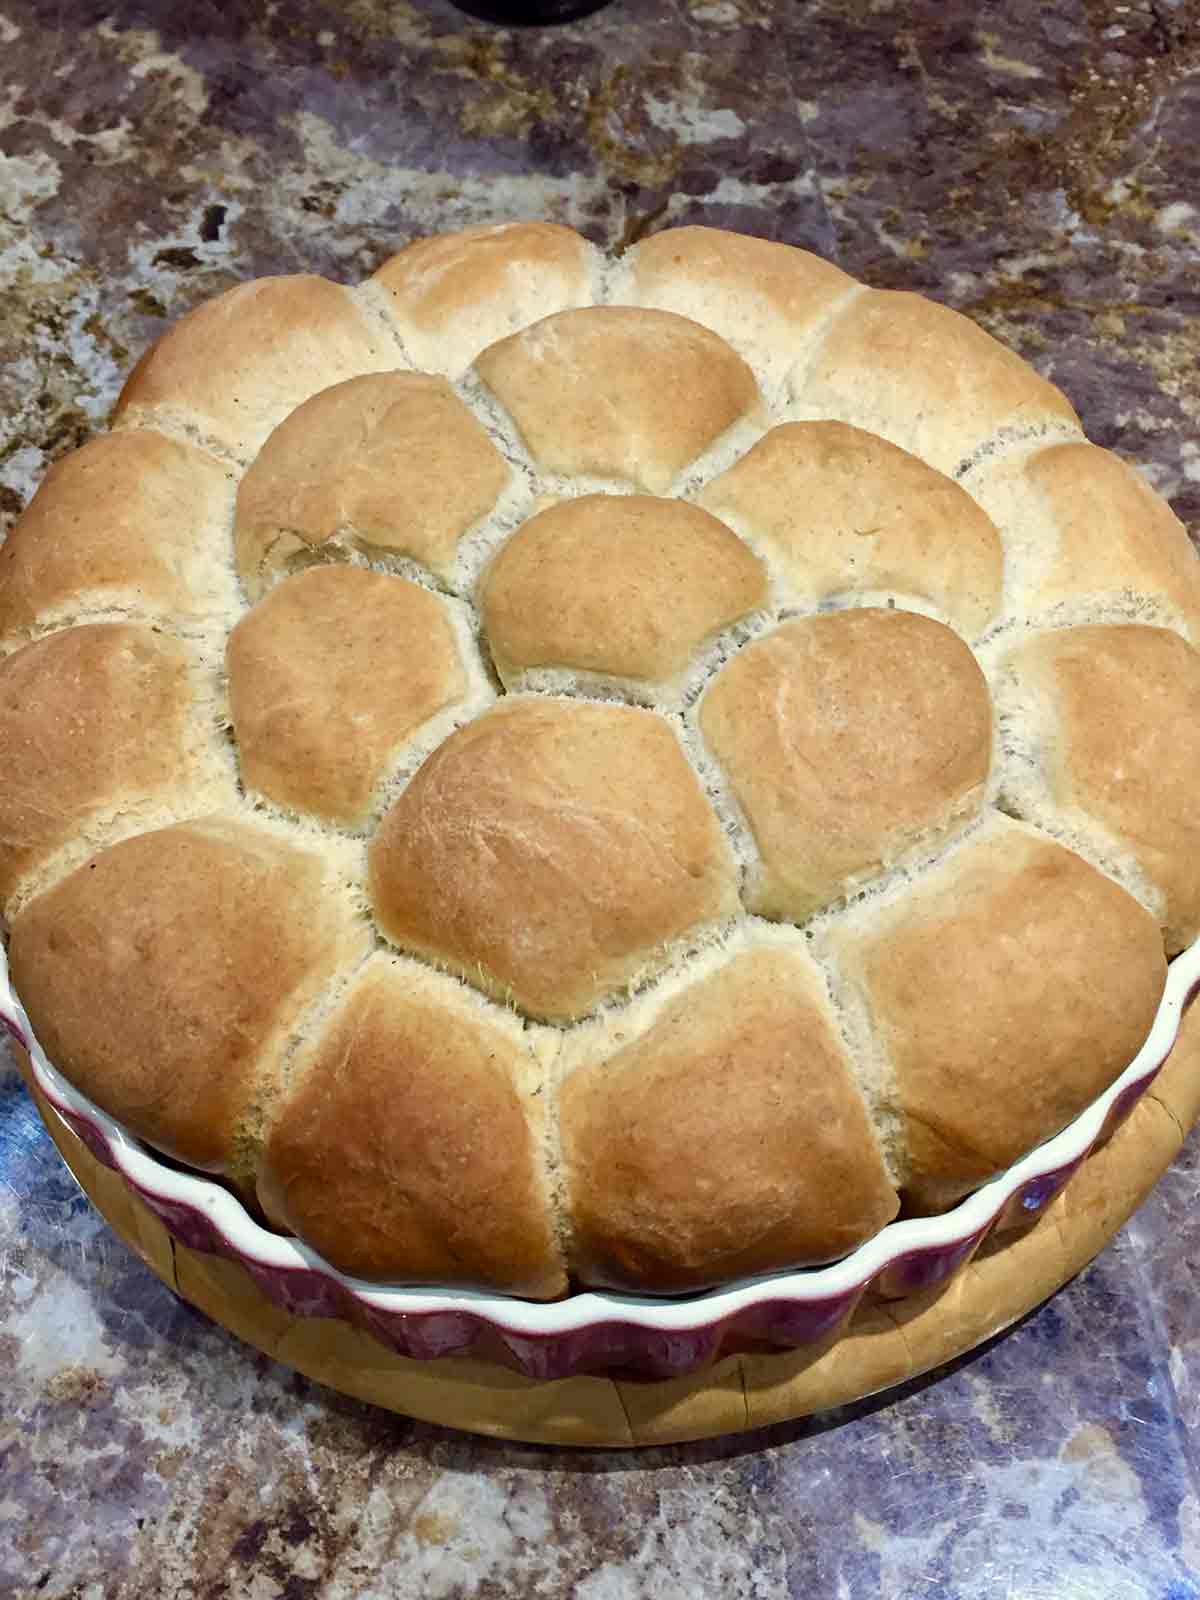
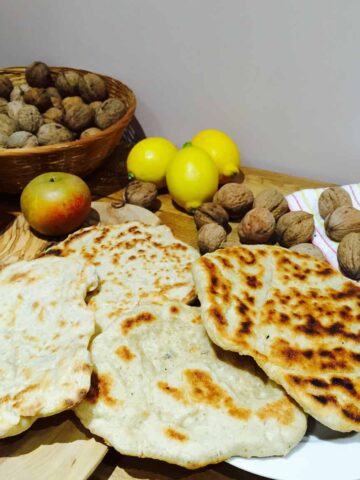
Tear and share spelt flour buns
Ingredients
- 400 g spelt flour
- 200 g white flour
- 300 ml water (lukewarm)
- 2 teaspoon yeast dry or fresh
- 1 tablespoon cane sugar (unrefined)
- 1 teaspoon salt (I used Himalayan pink)
- ¼ teaspoon black pepper (freshly ground)
- 100 ml buttermilk optional
- 50 ml olive oil
Instructions
- In a large bowl mix in the two types of flour, sprinkle the salt and form a well in the middle but try and sprinkle no salt in the actual well as yeast and salt don't like each other.
- In a cup/mug mix the yeast with the sugar and pour 100 ml lukewarm water. Mix well until both sugar and yeast dissolve. You could leave it in the cup or pour it in the well formed in the flour. I recommend the latter as leaving it in the cup requires that you keep an eye on it as it may overflow so, best is to pour it in and set aside for around 20 minutes.
- Once the yeast has become all a big bubble start kneading the bread. Pour the remainder of the water and the buttermilk. Mix very well and knead until the dough no longer sticks to your hand. This will probably take 4-5 min or so of continuous kneading.
- Gradually add the olive oil while still kneading. Feel free with punching, slapping, stretching, whatever you feel like doing with it but as I said the low glutenous flours do not require that much working/kneading.
- When finished, smooth the surface into a big ball and cover. Allow to proving for as many hours as you fancy. I normally leave it between 2-4 hrs. You may need to push back the dough once in between and allow to rise again.
- When finished with proving just form the dough into the buns and place onto a greased dish. Allow to prove again for an extra 40-60min and then place in the oven. Bake at 190C or 375F for 40-50 min until they get to a nice golden colour.
- When ready, turn off the oven, take out and allow it to cook for a good 10-15 minutes. Then, take out from the dish and place on a cooling rack. If you leave it too long in the baking dish it will sweat so it needs to be taken out as soon as 10-15 min after taking it out of the oven. This is an important step.
Notes
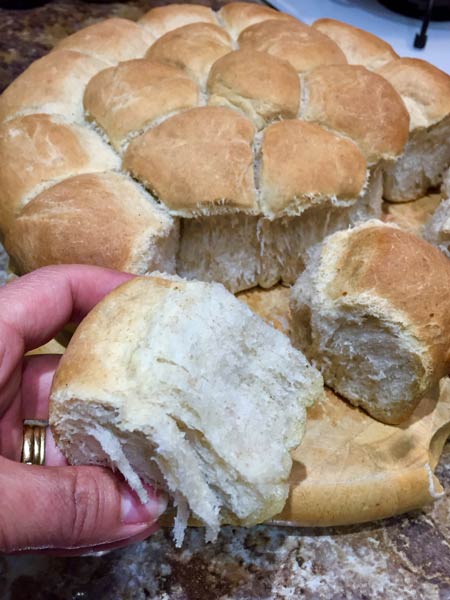 Break it if you want to eat it pretty warm and only cut when it has completely cooled. Personally, this never gets too far as it disappears pretty fast.
I also make this and place a camembert cheese in the middle - will post a recipe very, very soon - oh, that is so, so good!
I know you cannot eat this every day but once in a while - cheese and warm bread - oh, la, la - divine!!
After taking it out allow it to cool for at least 15-20 minutes.
Break it if you want to eat it pretty warm and only cut when it has completely cooled. Personally, this never gets too far as it disappears pretty fast.
I also make this and place a camembert cheese in the middle - will post a recipe very, very soon - oh, that is so, so good!
I know you cannot eat this every day but once in a while - cheese and warm bread - oh, la, la - divine!!
After taking it out allow it to cool for at least 15-20 minutes.
Nutrition
Kyla says
Sounds like a great concept but in the list of ingredients it doesn't refer to olive oil, buttermilk or crushed linseed which are mentioned in the method