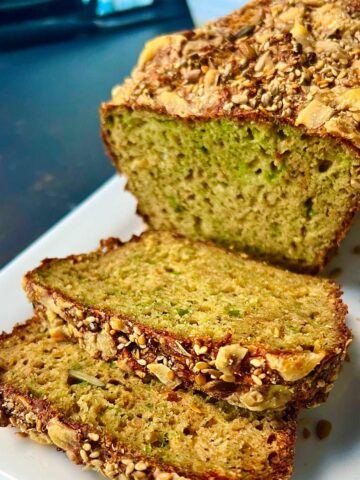
Bread making must be one of the most satisfying of all baking, well, for me at least. I could make, knead bread all day long, every day. This rye bread with ground linseed is so, so special and absolutely delicious.
I love making and baking bread, I love the smell of it all and of course, I love eating it.
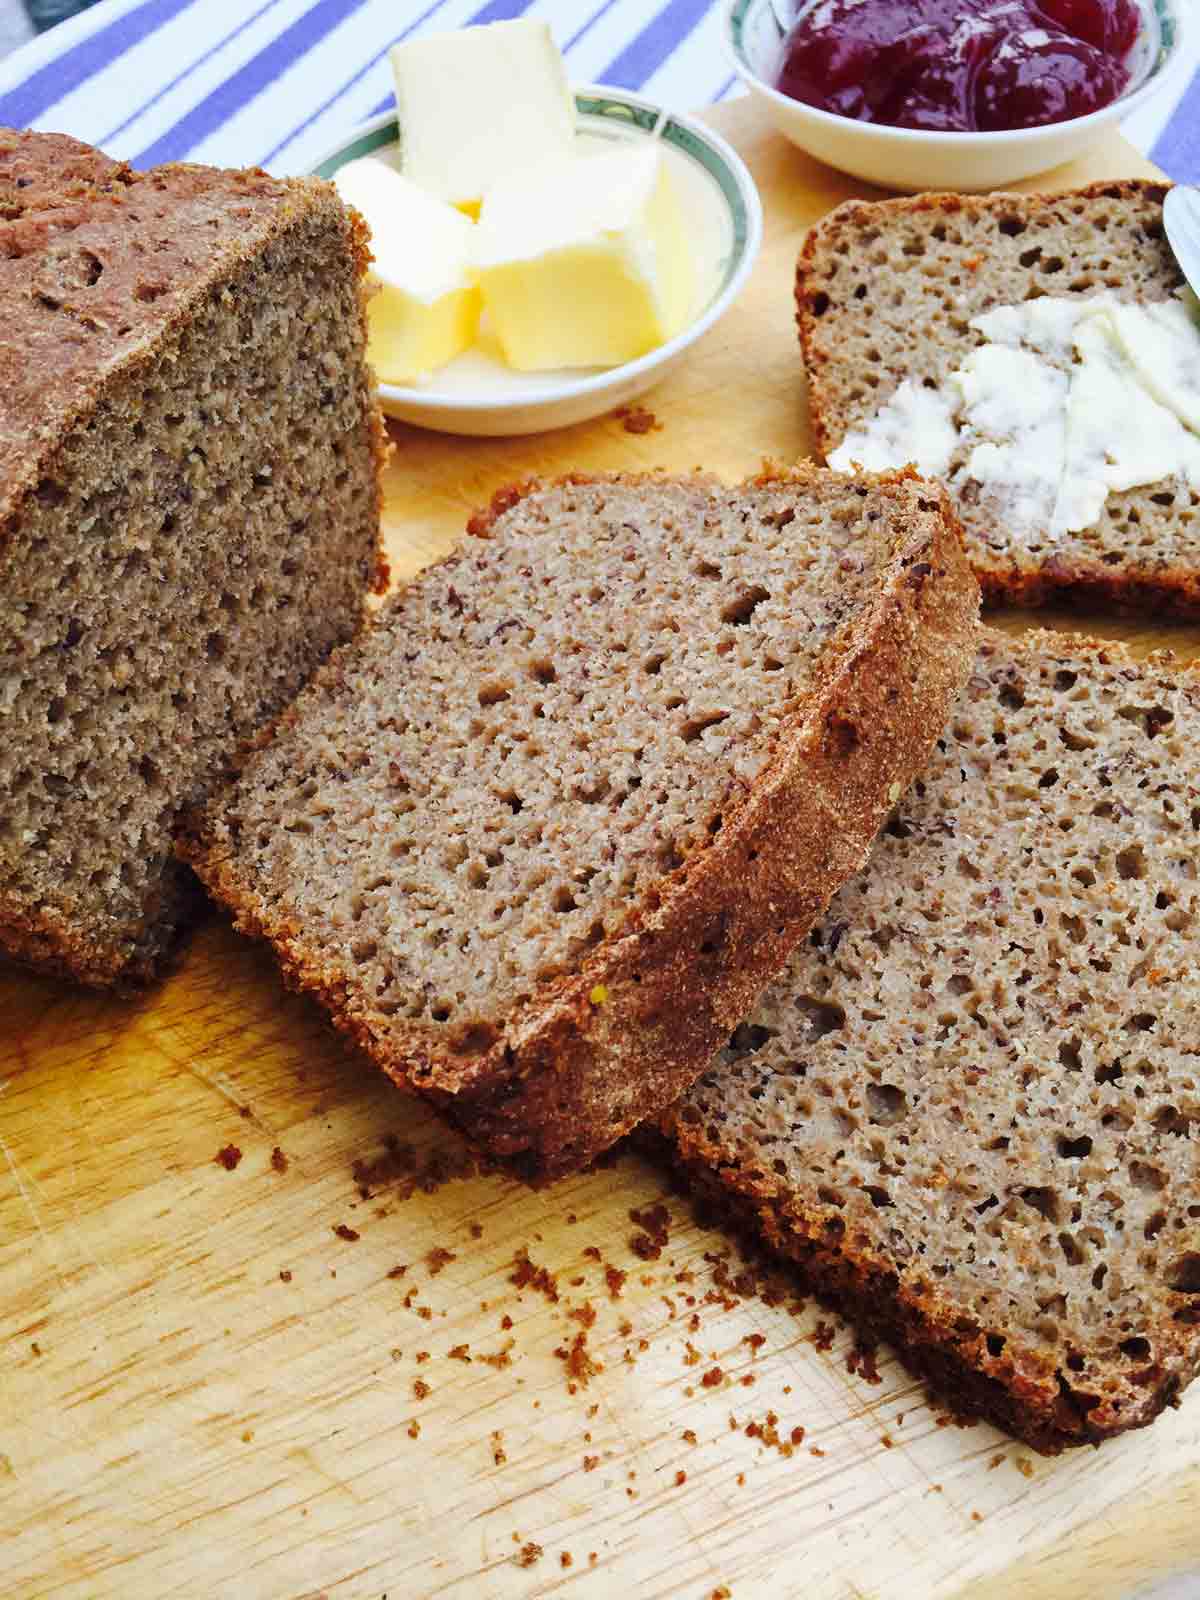
Love this rye bread with flax
Again it must be something haunting me from my childhood times because my both grandmothers used to bake the most amazing bread; all types and some of those were specific for Easter and Christmas times.
Generally, rye bread is a mixture of rye and wheat flour (normally a 2:1 ratio) but this time I have made this using rye and spelt flour at a ratio of 4:1 and I have mixed some ground flaxseeds for even more goodness.
Is bread-making easy?
Making bread, in general, it's not the easiest thing but it's not the hardest either. It can be a little bit more laborious but hey, it is very satisfying when you see this healthy rye and ground linseed bread coming out of the oven.
Generally, it is nice to see that people nowadays do get a lot more health-conscious and opt for healthier options and bread is one of those that you can really have a wide variety to choose from, especially nowadays.
I do use a lot of low glutenous flour such as buckwheat, rye, or spelt flour which is one of my favorites.
I like spelt mainly because I find that it is a lot better tolerated by my digestive system and I think this is a generality that applies to many digestive systems in most people, especially with age.
It is really good for us to go for bread that is high in fiber and any wholemeal, spelt, and/or rye bread is a superb option. I have to say that I almost stopped buying white flour for a good couple of years now using a lot healthier options in my baking or cooking. Oh, yes, I do get a pack of white flour when making some naughty doughnuts although even for those I replace the white flour with a healthier option.
My love for rye and ground linseed bread and all of this dark shaded or speckled with grains bread must be coming from traveling to Scandinavian countries and Germany as they do have the best bread in the world without any shadow of a doubt.
FAQs
Ultimately, the "better" choice depends on your personal health considerations, dietary restrictions, and taste preferences. Each grain has its advantages, and incorporating a variety of grains into your diet can offer a diverse array of nutrients and flavors. If you have specific dietary concerns or health conditions, it's always best to consult with a healthcare professional or a registered dietitian for personalized advice.
Rye and ground linseed bread/sourdough are truly delicious especially when you pair it with mature cheese or any smoked fish, because of its sweet and slightly nutty flavour. Some pros choose to make sourdough rye bread over five days or so but I find that crazy and totally unnecessary.
Yes, rye bread and spelt flour are naturally low in gluten levels, hence this does not rise like white flour or any glutinous flour would.
I agree that the longer you leave it the sweeter it will get because the starch converts into sugar but as I said, I don't find that necessary at all. It is still so delicious without having to leave it for 5 days around the kitchen or in the fridge. I occasionally leave it overnight but I did not find much difference in taste or texture so, what is the point I have asked myself.
This could be the very reason why perhaps many people are put off baking a good loaf of bread because of the time they think could be spent to make sourdough bread.
But let me tell you the good news!! It takes a max of 8 hours to make this bread and I will tell you exactly how I do mine and it is absolutely delicious every time I make it.
Kneading the dough is very important.
I know that rye bread has little gluten to develop but I think it's definitely worth putting the effort and kneading it properly for quite some time, rather than simply mixing the ingredients as some recipes say.
Step by step, I will take you through the 'process' of making a perfect loaf of rye bread and I can assure you that it requires nothing more than following these steps carefully and gracefully.
Make sure you buy a good quality stoneground rye flour. I hardly ever consider any flour that isn't organic but that's me being a little peculiar and a true lover of organic produce.
How To Make Ground Linseed Bread
But, just to summarize the steps for baking bread in general, they apply in most homemade and hand-prepared bread but are not the same when you choose to machine-make the bread.
Mixing
Put the flour(s) in your bowl, add the salt and the yeast mixture. Salt should not be put in the well as this can 'kill' the yeast. I sprinkle the salt on the upper edges of the well and not inside. Allow for the yeast reaction and then add around three-quarters of the remaining water. Use your hand or hands (it can be a little messy process, to begin with) to mix all the ingredients together. Incorporate all the flour and add more water (if necessary) until you have a nice and fairly soft (not too soft though) dough.
As you work the dough a little more, the messiness will disappear as the dough will not be so messy and sticky any longer, especially after adding the olive oil/butter or coconut oil.
Kneading
This process can take between 5 and 12 minutes (depending on the type of flour used - the more gluten the more the stretching) until the consistency of the dough changes slightly, becoming smoother and more elastic.
It will begin to hold together a lot better and you can form a nice and pretty smooth big ball. With less glutenous flour like rye, spelt or buckwheat there would be so much elasticity or smoothness that you can get out of it but I still stretch and work the dough for half the time. It is fully worth the time (around 5-6 min).
The Rising
Add a bit more oil, giving the dough a nice top coat and then cover with either cling film or a clean tea towel, so it keeps the warmth as well as drying too much. It might still form a skin but that is okay. The dough will begin to rise ( quicker when higher gluten flour is used and a lot slower for low gluten ones). The rising has reached its highs when the dough gets some creases and when this may start to deflate/go down. This is the point when we need to get to the next level which is when we push the dough back.
Shaping the dough
After rising, the dough needs to be pushed or knocked back down. This will knock the air bubbles out which will make it easier to shape and work with the dough. Shape it in any way you wish, such as a plat or however you wish your bread to look.
Proving
This is the final stage and it is a really important stage that does not get skipped or rushed. After shaping the bread we must allow it to rise again just before going into the oven. Brushing it with some oil again and covering the dough with cling film during this final stage is preventing it from forming skin.
It is important that you do not allow the dough to overprove, and the way you can observe the right stage is by slightly pushing the dough down and this should bounce back.
Again, on low gluten dough, this will not be as obvious as on white glutenous flour. If you get creases and cracks it means you have left it too long so you will have to reshape the dough and start the proving process again.
Baking and the cooling process
You will know the bread is ready if this has got a nice crispy crust and it is brown in colour.
The easiest way to check and see if the bread is truly ready is by taking it out of the oven and tapping it at the bottom of the metallic tray. This should sound hollow but if it doesn't, it's easy to guess, it's not ready so it needs to go back in the oven for a further 5-10 minutes.
Once you have decided it is ready and are fully satisfied and happy with it, get it out of the oven and let it cool either in the oven (unless slightly overdone) with the oven door completely open for about 15-20 min, and then allow to cool completely on a wire rack outside the oven, for a good hour before eating.
Tips
I always slice the bread and freeze it as it is likely that you won't have it all within a day unless you put it on the table for loads of people or for a party. Otherwise, when I bake it for the four of us only, I do freeze it (sliced and arranged nicely in freezer bags) a few hours after cooling has finished.
Freeze it from fresh and, whenever you want to have a slice or two, just toast the required amount, it's simply amazing. It tastes and feels as if it has just been freshly baked. If you choose to keep it, it has to be stored in a paper bag and has to be consumed within 3-4 days.
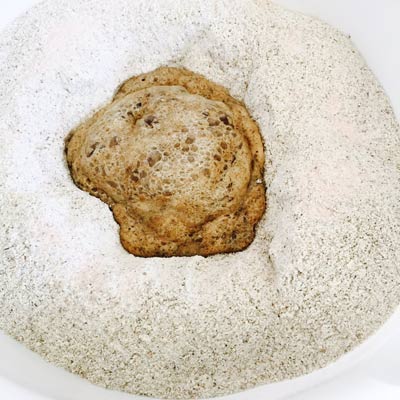
Following the first step of having the active yeast mixed with 2 teaspoon sugar is pretty crucial.
So, you either do it this way or simply have it all well mixed into a mug and then poured into the well. It is entirely up to you.
About 15-20 minutes later, you should have this big bubble of fermented yeast. The sugar and the warm water really help speed this up tremendously.
After 5-6 hours, the dough will be looking like this.
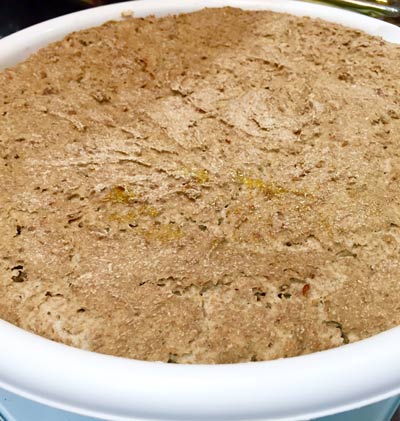
The only trick here is to keep it either in the sun for extra warmth or just near a heated sauce. It needs to be kept in a warm or sunny spot covered with a nice and clean table cloth. Some people put it in the oven at a low temperature (30 C or below) to speed up the process.
The dough forms a little crust on top, but that's OK and totally normal so don't panic.
Other recipes you may like:
- Healthy Lentil Bread
- Bread rolls with olives, chia seeds and crushed black pepper
- Vegetarian pizza on ciabatta bread
- Homemade flatbread
Here is the recipe so let's get kneading: get your dukes out and be prepared to do some nice punching! The nice thing is that the punching goes one way only and you are not receiving any dukes back ;-))
Bon appétit!
Rye And Ground Linseed Bread
Ingredients
- 1 kg rye flour dark
- 250 g spelt flour (light)
- 650 ml water (lukewarm)
- 200 ml buttermilk
- 100 g linseed (flaxseeds) (crushed/ground)
- 18 g dry yeast (fast action yeast is best)
- 2 teaspoon Himalayan salt (or sea salt, or kosher salt)
- 1 tablespoon sugar
- 4-5 tablespoon olive oil
Instructions
- In a large bowl mix in the flours, sprinkle the salt more towards the edges. Form a well in the middle. Make sure salt is not sprinkled in this well.
- In a cup/mug mix the yeast with the sugar and pour 100 ml of lukewarm water. Mix well until both sugar and yeast dissolve. You could leave it in the cup or pour it into the well-formed flour. I recommend the latter as leaving it in the cup requires that you keep an eye on it as it will overflow so, the best is to pour it in and set it aside for around 20 minutes.
- Once the yeast has become a big bubble start kneading the bread. Pour the remainder of the water and the buttermilk and the crushed linseed. Mix very well and knead until the dough no longer sticks to your hand. This will probably take 4-5 min or so.
- Gradually add the olive oil while still kneading. Feel free with punching, slapping, stretch, whatever you feel like doing with it but as I said the low glutenous flours do not require that much work but maybe half the time (5-6min instead of 10-12 min what would be needed for a higher gluten flour).
- When finished, smooth the surface into a big ball and cover.
- Allow to prove for as many hours as you fancy. I normally leave it between 4-8 hrs.
- When finished with proof just put it into the greased baking tray.
- Allow to prove again for an extra hour or so and then place in the oven. Bake at 190 C for 40-50 min.
- When ready, turn the oven off and allow a good 20-30 min to cool.
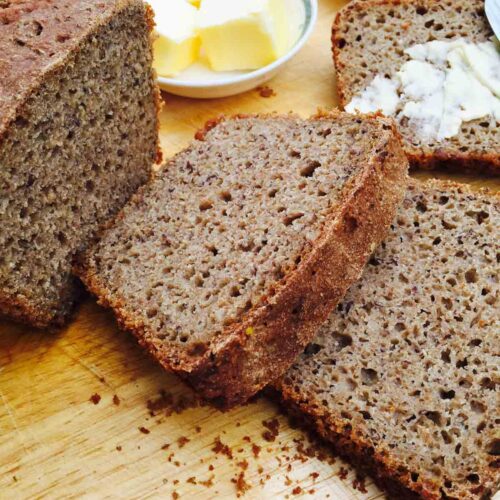
- Take out of the oven and cover with a towel for another 20-30 minutes outside the oven. Then, take it out from the baking tray and serve it slightly warm or cold with anything you like, whether that's sweet or savory. Simply divine! P.S. Break it /tear it if you want to eat it pretty warm and only cut when it has completely cooled.
Nutrition

Leila says
Is it possible that either the liquid or flour amounts are off? It seems extremely dry compared to other bread recipes and when I tried making it I needed almost double the liquids to form a dough (as it's written the dough looked like dry crumbles).
Ramona says
Hi Leila,
Thank you for getting in touch and flagging this up. It is a typo indeed and the water amount has been amended to 650 ml which is what should be. Thank you again 😉
Brandie says
magnificent recipe and it was my first attempt. i managed to fully impress my gf and her bestie. thanks so much for this recipe!
Ramona says
Yay!! Succes!! I am so glad for you and thanks for your feedback. It is greatly appreciated.